A Winter Mountain Leader Assessment Primer
By George McEwan - Executive Officer, Mountain Training Scotland
Introduction
Of all the Mountain Training qualifications, Winter Mountain Leader is one of the more physically and technically challenging. A major part of this is the demands that operating on the winter hills and mountains poses – whiteouts, variable snow conditions, storms and short day light hours all conspire to create one of the most demanding mountaineering environments in the UK. The Winter Mountain Leader scheme is operated on behalf of Mountain Training by Mountain Training Scotland (MTS) and “the purpose of the Winter Mountain Leader scheme is to provide training and assessment of the skills and techniques necessary to lead walking parties on the hills and mountains of the UK under winter conditions, excluding roped climbing on technical terrain.” Although many people do the qualification for it’s own sake i.e. to lead hill walking parties under winter conditions, others see the qualification as an essential stepping stone to doing their Mountaineering Instructor Certificate (MIC) which covers the additional skills required for teaching/leading/instructing/guiding all aspects of winter mountaineering and winter climbing.
This article will discuss what potential Winter Mountain Leader assessment candidates can do to prepare for their assessment. In a way though, I’m reinventing the wheel here - the Winter Mountain Leader Candidate Handbook, which has had the input of many very experienced individuals, discuss a lot of what this article will cover. I’ll focus on the main elements that candidates typically have issues with in gaining experience and on assessment: logging Winter Quality Mountain Days and Grade I climbs, security on steep ground, navigation and avalanche awareness.
My first and main top tip (this is not just for candidates but also those involved in the training and assessment process) is to read the Candidate Handbook. These cover in a very clear and comprehensive way, everything you need to know about the Winter Mountain Leader qualification.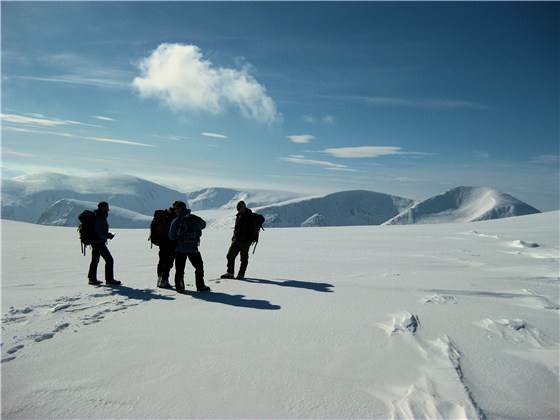
Gaining experience and Quality Mountain Days
A key facet of all the Mountain Training qualifications is that competence is fundamentally based on extensive quality personal experience of the activity. In this case – the Winter Mountain Leader – you need to have logged over forty quality winter days, gained in three different mountain areas in the UK over a minimum period of two winter seasons.
This logging winter days, to be specific quality mountain days, always creates some discussion. What exactly is a quality mountain day or QMD? Well, as is stated in the Candidate Handbook – "Although it is difficult to define such a unit of experience there are a number of common characteristics. The adversity of weather conditions, the changeable nature of the underfoot conditions, the requirement to navigate accurately and carry greater amounts of equipment etc, all affect speed of movement and distance travelled. However Winter Quality Mountain Days are likely to be strenuous and reasonably demanding and will involve over 5 hours walking and/or climbing." As the qualification is for hill walking in winter conditions in the UK, any winter climbing should be part of a longer mountain day and not the sole reason for the excursion.
"Winter Quality Mountain Days should involve elements of planning, exploration of an unfamiliar locality, map reading/navigation and more than likely require the use of ice axe and crampons for security. Above all the experience should lead to feelings of accomplishment and satisfaction, even if enjoyment may occasionally be questionable!" There you go – couldn’t have put it better myself! Yet despite these criteria many candidates present themselves for assessment with a minimum, or in some case less than the minimum, number of QMDs. No prizes for guessing what their assessment experience is going to be like…
I think one key point to highlight is that the Winter Mountain Leader qualification is about leading hill walking parties in winter conditions. A key concept in any training is specificity – how you train and what you train and the gains that result from it are specific to how you have trained. So if your QMDs involve lots of winter hill walking in a variety of areas, weather conditions and snow types then the gains you make in developing this experience e.g. fitness, technical competence, decision making skills etc will carry straight into how you operate as a Winter Mountain Leader. My opinion, I’m going to be a bit partisan seeing as I’m from Scotland, is that there is nothing like the Scottish Highlands in winter time to present a wide variety of tough, challenging winter adventures. For sure North Wales and the Lakes have winter conditions, especially the past few winters, but you are never that far from a road or habitation. That’s not always the case in the Scottish Highlands. Likewise with overseas experience – if the overseas experience is very close to the winter environment encountered in the UK then that experience may well be valid. However the Winter Mountain Leader is a UK based qualification so the bulk of your winter experience should be UK based.
As the guidance notes state “the majority of this experience, at least 75% of the days recorded, should be in the UK. These days should be your personal experience and not days being guided or under instruction. At assessment at least 50% of the days must be in Scotland.” So your days need to have the majority UK based, with at least 50% gained in Scotland and be done with you either in sole charge of your party, on your own, or with peers. When with peers I would suggest that you play a full part in the decision making etc rather than following a more experienced friend who makes all the calls, does the navigation etc.
So second top tip – is read the above, then get out there into the Scottish winter mountains and go have adventures.
In addition to your QMDs you will need to have logged at least 10 Grade 1 named Scottish winter climbs. This requirement to have completed climbs, in what is essentially a hill walking leadership qualification, always provokes the question – why? In winter time the boundary between hill walking and mountaineering is very blurred. For example: very icy underfoot conditions coupled with snow build-up can turn what was an innocuous slope into something far more technical and challenging. In such a situation the Winter Mountain Leader has to be able to move about the ground in a skilful, relaxed and efficient manner so that they can devote all their head space to managing their team.
Hence there is a requirement for a Winter Mountain Leader to be able to move about on this type of mountaineering terrain.
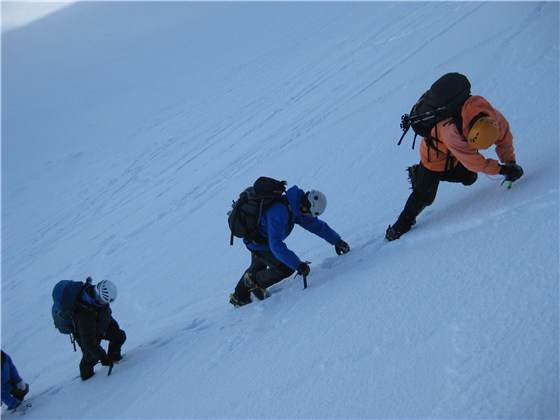
It can be difficult to quantify whether candidates have this experience, hence having a requirement to have completed 10 Grade I climbs is a short hand way of ensuring that a Winter Mountain Leader candidate has definitely had experience of moving on steep terrain. In saying that the guidance notes also state that this Grade I ground could also be "snow covered ground, often with easy angled steps of ice, neve or rock on which a fall or slip could have potentially serious consequences". In many Winter Mountain Leader situations dealing with steep open and exposed snow slopes also comes into the ‘graded ground’ category. So although logging a few Grade I climbs is required, perhaps think about gaining experience on routes such as Angel’s Ridge on Sgorr nan Lochan Uaine, or the Forcan Ridge up in Glen Shiel. The bottom line is you will be required, on your assessment, to move about on Grade I mountaineering type ground which could be steep open snow slopes, snow covered rock and turf, hard neve, etc. So experience of a variety of underfoot conditions on equivalent Grade I type ground is essential. You will not be much use to your group if you are a shaky, quivering wreck cautiously teetering across a snow slope trying to look after them. Confidence breeds confidence – so if you are confident in all likelihood your group will take heart from that.
Top Tip Number 3 – develop your Grade I winter ‘climbing’ experience on a variety of underfoot conditions and situations e.g. hard snow, soft snow, icy snow, snow covered rock, mixed ground (ice, turf, snow and rock), on gullies, ridges and open slopes. What to log and how to log it.
All this winter experience will need to be logged as evidence that you have actually gained this experience. On your assessment the assessment team will need to review your logbook with your total number of winter QMDs, Grade I climbs and a valid first aid certificate. This information needs to be presented in DLOG.
Although the assessment team are primarily interested in QMDs it is worth recording all your winter days and they give a wider appreciation of your overall experience. So assuming that someone comes for assessment with the minimum of 40 winter QMDs, I would usually expect that to achieve these unique days which give “feelings of accomplishment and satisfaction” that they will usually have completed around another twenty or so days which will not have been of the same quality. So please bear in mind your QMDs are the cream of your winter hill walking and mountaineering experience – not the sum total of it.
Top Tip Number 4 – log all your winter experience, including your QMDs, Grade I climbs and other winter experience.The Assessment process
Many Winter Mountain Leader assessment providers will run their own assessment programme. MTS provides guidance to providers on a suggested structure for their assessment course, although providers have a reasonable level of flexibility to run their assessment in a way that best suits prevailing local conditions etc. For this reason I’m not going to run through the structure of an assessment programme but deal more with the syllabus headings and what the assessors will be looking for. As I said earlier the Winter Mountain Leader Candidate Handbook covers this in some detail so I’ll be looking to provide some background rather then rewrite the guidance notes. With regards to how the assessment is run, it will tend to be similar in style to how many of the other Mountain Training assessments are run. There is no one ‘right’ or ‘approved’ way of carrying out a particular task and different trainers will tend to teach variations on a theme rather than all teach the same technique. So assessors will be looking for any methods/approaches that are safe and appropriate rather than their pet method or approach. During the course of the assessment you will be assessed by at least two assessors. Final decisions are made, not based on one point of view but a consensus amongst the assessment team, hence this ‘smooths out’ any particularly strong opinions by one or another assessors.
As I said at the start of this article I’ll focus on the main elements candidates tend to have challenges with on assessment namely: security on steep ground; navigation; snow and avalanches.
Security on Steep Ground
The syllabus description for security on steep ground states that “Candidates should be able to provide security for individual members of a hill walking party during ascent and descent of short sections of ground up to and including Grade 1 ground and cornices, using techniques appropriate to equipment carried by a hill walking party, for example, ice axe, rope, sling and karabiner.”
On your assessment there will in all likelihood be a day on the assessment programme that is titled 'Security on Steep Ground'. However, in all likelihood you will face security on steep ground issues at other times during the assessment week. Different assessors will assess this day in different ways and styles. Usually this day will involve working in small teams (usually a group of four, split into two teams of two with one assessor covering the whole group of four).
As the syllabus states (see above) you’ll have your axe, rope (this could be anything from 30m to 50m although 50m of rope is a heavy weight to carry for something that is billed as an unplanned event or emergency), sling and karabiner. Given the use of a rope is, as in summer, an unplanned event or an emergency then it is expected that a Winter Mountain Leader candidate should be able to get an individual, or their team, out of trouble. In reality this is very, very unlikely to involve a Winter Mountain Leader managing multi-pitch descents/ascents with a group of inexperienced winter walkers. In this situation it is more likely that you would seek to avoid the situation by re-examining your map and identifying a more appropriate route. Potentially a common ‘unplanned event’ would be dealing with a slope that has a small cornice feature which may involve getting the team over or down it and hence onto easier ground.
One, and I stress one, of the ways in which this is assessed involves the assessor outlining a scenario for a candidate to deal with. The main advantages of setting a scenario in this way is that the candidate has to assess the situation and based on the situation, conditions etc make a judgement about an appropriate course of action. So the assessor is not just seeing a technical exercise but also the candidate’s ability to make judgements about unplanned events. This allows a holistic approach to steep ground as the candidate will also have to take into account the prevailing snow and avalanche conditions.
Not all security on steep ground scenarios may necessarily involve using the rope. In some snow conditions and situations it may be more appropriate, for example, to cut bucket steps for your group to follow behind you. I view step cutting as a security on steep ground tool. In hill walking and mountaineering situations when I am leading it is one of the tools that I tend to use more than the rope. Good positive platforms that your team can step onto help reduce the chances of a slip occurring. So consider cutting good positive bucket steps as a security on steep ground tool. Likewise if the snow is not as firm then kicking good solid steps/platforms for your team to follow in will have the same effect. A key element in managing your team on steep ground is making a good judgement (probability of an individual slipping/falling and the outcome of such an incident) about what the risk is to your team and individuals within it.
Top Tip Number 5 – practise step cutting buckets and kicking steps and view them as security on steep ground tools.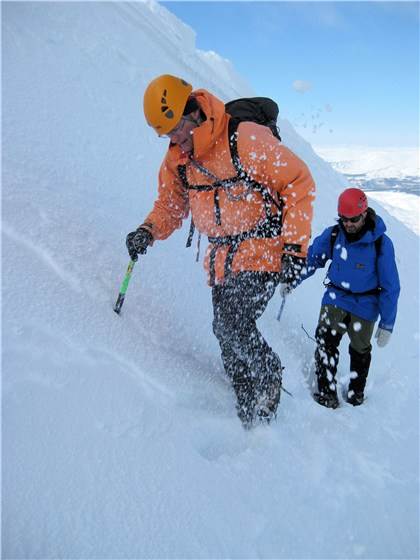
Putting aside any discussion about specific snowpack and related avalanche conditions – I’ll deal with this aspect as a topic in it’s own right - what typically goes wrong for candidates during security on steep ground scenarios?
Some of the common issues highlighted are:
- Poor judgement about snow conditions and its relation to the construction and use of what is an appropriate anchor method.
- Candidate not practised in creating and tying into a snow anchor set-up.
- Unconfident movement on steep ground.
- Poor judgement about high risk situations i.e. what is the probability of something happening and what are the consequences?
As you can see all of these issues are fundamentally related to a lack of experience and practice.
When dealing with security on steep ground situations, having a great deal of prior experience such as assessing different snowpacks and choosing the appropriate belay option is fundamental to a safe and effective solution. So when practising security on steep ground scenarios, vary the terrain and snowpack you work on to help gain that experience. Digging your bucket seat first (assuming you plan to use one) gives you some key info about the underlying snowpack and any layers etc that may help inform your anchor construction.
This may sound harsh but there are NO excuses for being slow or unpractised when tying into your anchor or tying knots etc in the rope. The rope work used in the Winter Mountain Leader is broadly similar to that used at Mountain Leader standard. So techniques taught, learned and assessed while gaining the Mountain Leader qualification will transfer to winter. If it’s been a few years since your training then refresh your memory by practising all this in the house. Once you have the basics back in your head then ensure you can also do it with cold hands and gloves on – that’s doing it outside in all weathers and conditions. It’s an easy one to get sorted and it does impress the assessor (we’re easily impressed!).
The requirement for having personal experience on Grade I ground is there for a reason. Dealing with an unplanned situation or emergency on steep ground will take up a great deal of your head space. You do not want to be worrying about your own safety when you are sorting out the safety of your team. So ensure that you are practised with axe and crampons on all types of typical mountaineering terrain, going up/down/sideways in all types of snow conditions from boilerplate neve to knee deep gloop.
Whilst making judgements is based on experience, when practising dealing with situations think about the likelihood of, for example, a novice slipping and the outcome. You can run through your thoughts and decisions when you are out practising with your peers – in effect, peer review your decisions. Hopefully you should all be of the same or a similar opinion. If there are dramatic differences of opinion then consider chatting this through with someone more experienced e.g experienced Winter Mountain Leader holder, Mountaineering Instructor Certificate holder etc. and get their take on the situation.
Top Tip Number 6 – develop a breadth of experience by varying your practice for steep ground scenarios and gaining experience of a variety of snowpacks and conditions.Navigation
A key stone of the Winter Mountain Leader qualification is safe, confident, efficient and effective navigation in poor weather conditions including white out and darkness. It is this ability to navigate, whatever the conditions, which allows Mountain Leaders to avoid potential emergencies and situations by carefully planning their route, identifying potential hazards, and when out on the hill, safely steering their group around said hazards. Much of the navigation done on the assessment is carried out on the three day expedition. However, often assessors will make use of the time spent travelling to and from venues on the previous days to give candidates an opportunity to ‘tune in’ to navigating. Although 1:50,000 scale maps are the most commonly used map on the expedition, candidates are expected to be able to use 1:25,000 maps. So ensure your practice reflects using both map scales.
Top Tip Number 7 - when practising your navigation ensure that you are comfortable with using both 1:25,000 and 1:50,000 scale maps in all conditions.
What typically goes wrong for candidates when navigating? An easy answer is a lack of practice in all weathers and conditions including poor visibility and darkness. Specifically the fundamental error commonly made is poor ground to map and map to ground recognition and interpretation. This stems from an overreliance on ‘straight line’ navigation using the compass and pacing/timing. What this means is the individual takes a bearing from Point A to Point B, measures the distance, eyeballs the compass and off they go. Now if you do not have a picture or description in your head of the terrain you are travelling over (often referred to as map memory), then if you were not at Point A but actually at Point C you would soon pick this up as the ground does not unravel into a shape you envisaged. Likewise when you get to Point B there will not be a large marker saying ‘You are here’! So now you need to verify exactly where you are. This requires good relocation skills. Fundamental to using these effectively is good ground to map/map to ground interpretation skills. Candidates often do not take the time to locate or verify where they are. They then go onto the next leg, compounding any error.
So take the time and effort to develop your ground to map/map to ground interpretation skills. How to do this? Well first off, rather than stopping every 100m, taking the map out of your pocket and looking at it, take the time to fix a description or picture of the terrain along your planned navigation leg in your head, stick the map in your pocket and head off on your navigation leg. As you walk off on your leg tick off the terrain features in your head as you follow your navigation leg. The challenge is to reduce the stop/start to check the map during a leg.
Top Tip Number 8 – develop your map memory skill when navigating.
When you arrive at your destination take the time to verify your position. With practice this will become second nature and very quick. To verify your position, first off, look around you. Even in poor weather your visibility may well still be reasonable. Look at what the ground is doing around you. Cross reference what you see with what the terrain on the map indicates. Essentially you are creating a theory – I am here – then challenging it - if I am here I should see w, x, y, z features. By using four pieces of information to prove you are where you estimate you are, you reduce the risk of making the information fit. With three bits of information it is often very easy to make them fit your location jigsaw. By using four pieces of information, although you well make three fit, you’ll not get four to fit. The piece of info that does not fit into the jigsaw is the piece that is telling you that you are not where you think you are.
If the visibility is very poor then you may have to walk the ground around your location to gain a feel for what is happening underfoot. To do this use cardinal points of the compass and head out for at least 50m. You’ll need this distance to gain enough terrain information. Often in white out conditions as you walk off and look back you can still see your team. Their location in relation to you e.g. are they above you or below you, helps give a shape to the underlying ground.
Top Tip Number 9 – when verifying or locating your position use at least four bits of terrain information and ensure they all fit your location jigsaw.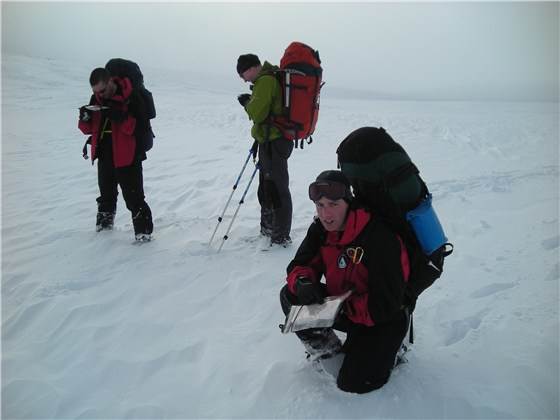
Snow and Avalanches
Candidates are assessed on evaluating the terrain, snowpack and weather conditions to draw sensible educated conclusions regarding avalanche hazard. On assessment, although this topic is often formally explored in its own right, it is also a key part in making safe decisions on steep ground and selecting and planning a safe navigation route. Hence decision making about avalanche risk forms an integral part of exercising these specific skills.
Although most assessment home study papers will have a large section on avalanche awareness, the assessors will be particularly interested in how the candidate applies their theoretical knowledge to practical situations. How this is done in practice really does depend on the prevailing conditions. If conditions are particularly ‘avalanchy’ then this assessment can be done for real (although assessors will be taking into account the possible consequences of any errors in judgement). In more stable snow conditions assessment may rely more on questions and answers about hypothetical situations.
The following Winter Mountain Leader syllabus elements are the ones that candidates frequently have problems with on assessment:
list]
1.1 interpret snowpack structure through the use of snow pit analysis and shear tests.
1.3 identify possible windslab and cornice formation on a particular slope as a result of snowfall intensity and wind direction.
1.4 identify how changes in weather conditions effects the snowpack.
1.6 identify situations of high avalanche danger and those of little avalanche danger.
[/list]
A key part of a sound approach to avalanche awareness is being able to collate information from various sources prior to heading out onto the hill, to create a theoretical avalanche risk model i.e. using personal observations from previous days on the hill, weather forecasts and the current area specific avalanche forecast from the Scottish Avalanche Information Service (SAIS). On the approach into the hill/corrie, personal observations about how the weather, snowpack and terrain are interacting are then used to challenge or confirm the previously created theoretical avalanche risk model. It is this stage that candidates frequently have a problem with on assessment. All this relates to syllabus sections 1.3; 1.4; and 1.6
So what are the causes of candidates having a problem with carrying out this process? Often candidates do not adequately understand the avalanche forecast prepared by SAIS. Although the new avalanche forecasts have been in use for a while now, many candidates seem unused to interpreting the information contained therein. A key part of this is not taking into account that the avalanche risk in the forecast may be elevation dependent, that the avalanche risk may be localised and candidates failing to comprehend the detail in the description of what the snowpack and weather have been doing and how the forecasted weather may affect the avalanche risk. This can be compounded by failing to make sound observations about what is actually happening on the ground. A lot of information about the potential avalanche risk can be gained simply by observing what is happening as you walk into and on the hill. Using the Be Avalanche Aware model to structure observations can help ensure that no information is overlooked.
Top Tip Number 10 – when using the information contained in the SAIS avalanche reports take time to digest and comprehend the detail in the forecast description.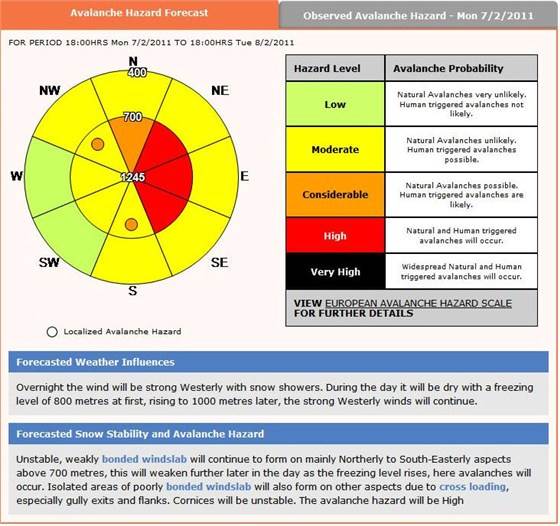
Another area which candidates sometimes struggle with is syllabus section 1.1 ‘interpret snowpack structure through the use of snow pit analysis and shear tests’. This is a bit more complex to explain but the weaknesses highlighted above certainly seem to underpin candidates making sound or not so sound judgements about the snowpack and potential avalanche risk. Basically you need to understand the big picture so you can accurately use any information gained from a small localised area. A common way candidates gain this localised information is the use of snowpit analysis and shear tests. Snowpit analysis and shear tests can be split into two approaches – quick tests that you make ‘on the hoof’ and more formal and involved analysis involving digging a pit, identifying layers and carrying out shear tests.
Using ‘on the hoof’ quick tests such as trenching etc are very useful in that you can make multiple ‘tests’ as you move around the hill. This serves to give a broad information base as to what is happening underfoot with the snowpack as you move around the hill. This practical information, combined with a good solid understanding of the ‘big picture’ avalanche risk, is a fundamental part of making sound decisions about avalanche risk as a Winter Mountain Leader.
Top Tip Number 11 – ‘on the hoof’ avalanche quick tests maximise information gained in relation to time spent carrying them out, giving a broad information base as to what is happening underfoot with the snowpack as you move around the hill.
Digging a large pit to spend time identifying and analysing layers, then performing shears tests is less useful as an avalanche risk assessment tool. Why? Digging a large pit takes time, as does carefully analysing the layers contained therein, then performing shear tests on the layers. Due to the time it takes and the time pressures on a mountain leader in winter (bad weather, short daylight hours etc.), fewer of these formal pits tend to be done. Also when such a pit is dug there is always the risk, due to its localised nature, that the part of the snowpack the pit has been dug in could be an unusually stable or unstable part of the snowpack. Decisions based on the knowledge gained in just one or two such pits could be fundamentally flawed. Hence ‘on the hoof’ quick tests allow a greater number of snowpack assessments to be carried out and due to the larger number of tests done, mean that any localised variations are evened out. These ‘on the hoof’ tests also serve to provide practical information to support or challenge our previously created avalanche risk model. Don’t get me wrong, I’m not saying don’t do formal snow pits and shear tests. What I am saying is, understand their limitations and consider them more as an educational tool – to develop your knowledge of snowpacks - rather than as a risk assessment tool.
Summary
A key facet of the Winter Mountain Leader qualification, as of all the Mountain Training schemes, is that competence is fundamentally based on extensive quality personal experience of the activity. For the Winter Mountain Leader the minimum experience required for assessment is 40 quality mountain days (QMDs) plus 10 Grade I climbs gained in three different mountain areas in the UK over a minimum period of two winter seasons, with the majority of this experience, at least 75% of the minimum, recorded in the UK. These days should be your personal experience, not days being guided or under instruction. At least 50% of the minimum days must be in Scotland.
It should be stressed that this is the minimum experience required. Most of the issues candidates have on assessment generally stem from a lack of experience and practice. The main areas candidates flounder on are not enough ‘real’ QMDs, security on steep ground, navigation and avalanche awareness.
To ensure you prepare thoroughly please read the Winter Mountain Leader Candidate Handbook. This covers in a very clear and comprehensive way everything you need to know about the Winter Mountain Leader qualification.
After reading the above get out there into the Scottish winter mountains and go have adventures. Whilst having these adventures develop your Grade I winter ‘climbing’ experience on a variety of underfoot conditions and situations; hard snow, soft snow, icy snow, snow covered rock, mixed (ice, turf, snow and rock) on gullies, ridges and open slopes. Then log all your winter experience - but ensure your QMDs and Grade I climbs are easily and legibly identifiable in your logbook.
Whilst practicing steep ground scenarios spend time step cutting bucket steps and kicking steps and view them as security on steep ground tools. Develop a breadth of experience by varying your practice for steep ground scenarios and gaining experience of a variety of snowpacks and conditions, all of which will help you make good judgements about which anchor systems are appropriate.
When it comes to navigation ensure that you are comfortable with using both 1:25,000 and 1:50,000 scale maps in all conditions. To avoid stop/start navigation which will affect your timing estimate, develop your map memory skill when navigating. When it comes to verifying or locating your position use at least four bits of terrain information and ensure they all fit your location jig-saw.
A common pitfall in avalanche awareness is candidates not using the information contained in the SAIS avalanche reports. Take time to digest and comprehend the detail in the SAIS forecast description. After formulating a view based on several information sources (personal observations, SAIS forecast, weather forecasts etc.) use your own ‘on the hill’ observations to challenge or confirm this view. To maximise information gained in relation to time spent carrying them out use ‘on the hoof’ avalanche quick tests. These ‘on the hoof’ tests help in giving a broad brush information base as to what is happening underfoot with the snowpack as you move around the hill and minimise the chances of basing decisions on unusually localised pockets of instability or stability.
Good luck and enjoy your winter assessment preparation. Here’s hoping for a snowy, icy, blue sky winter!